The Backyard
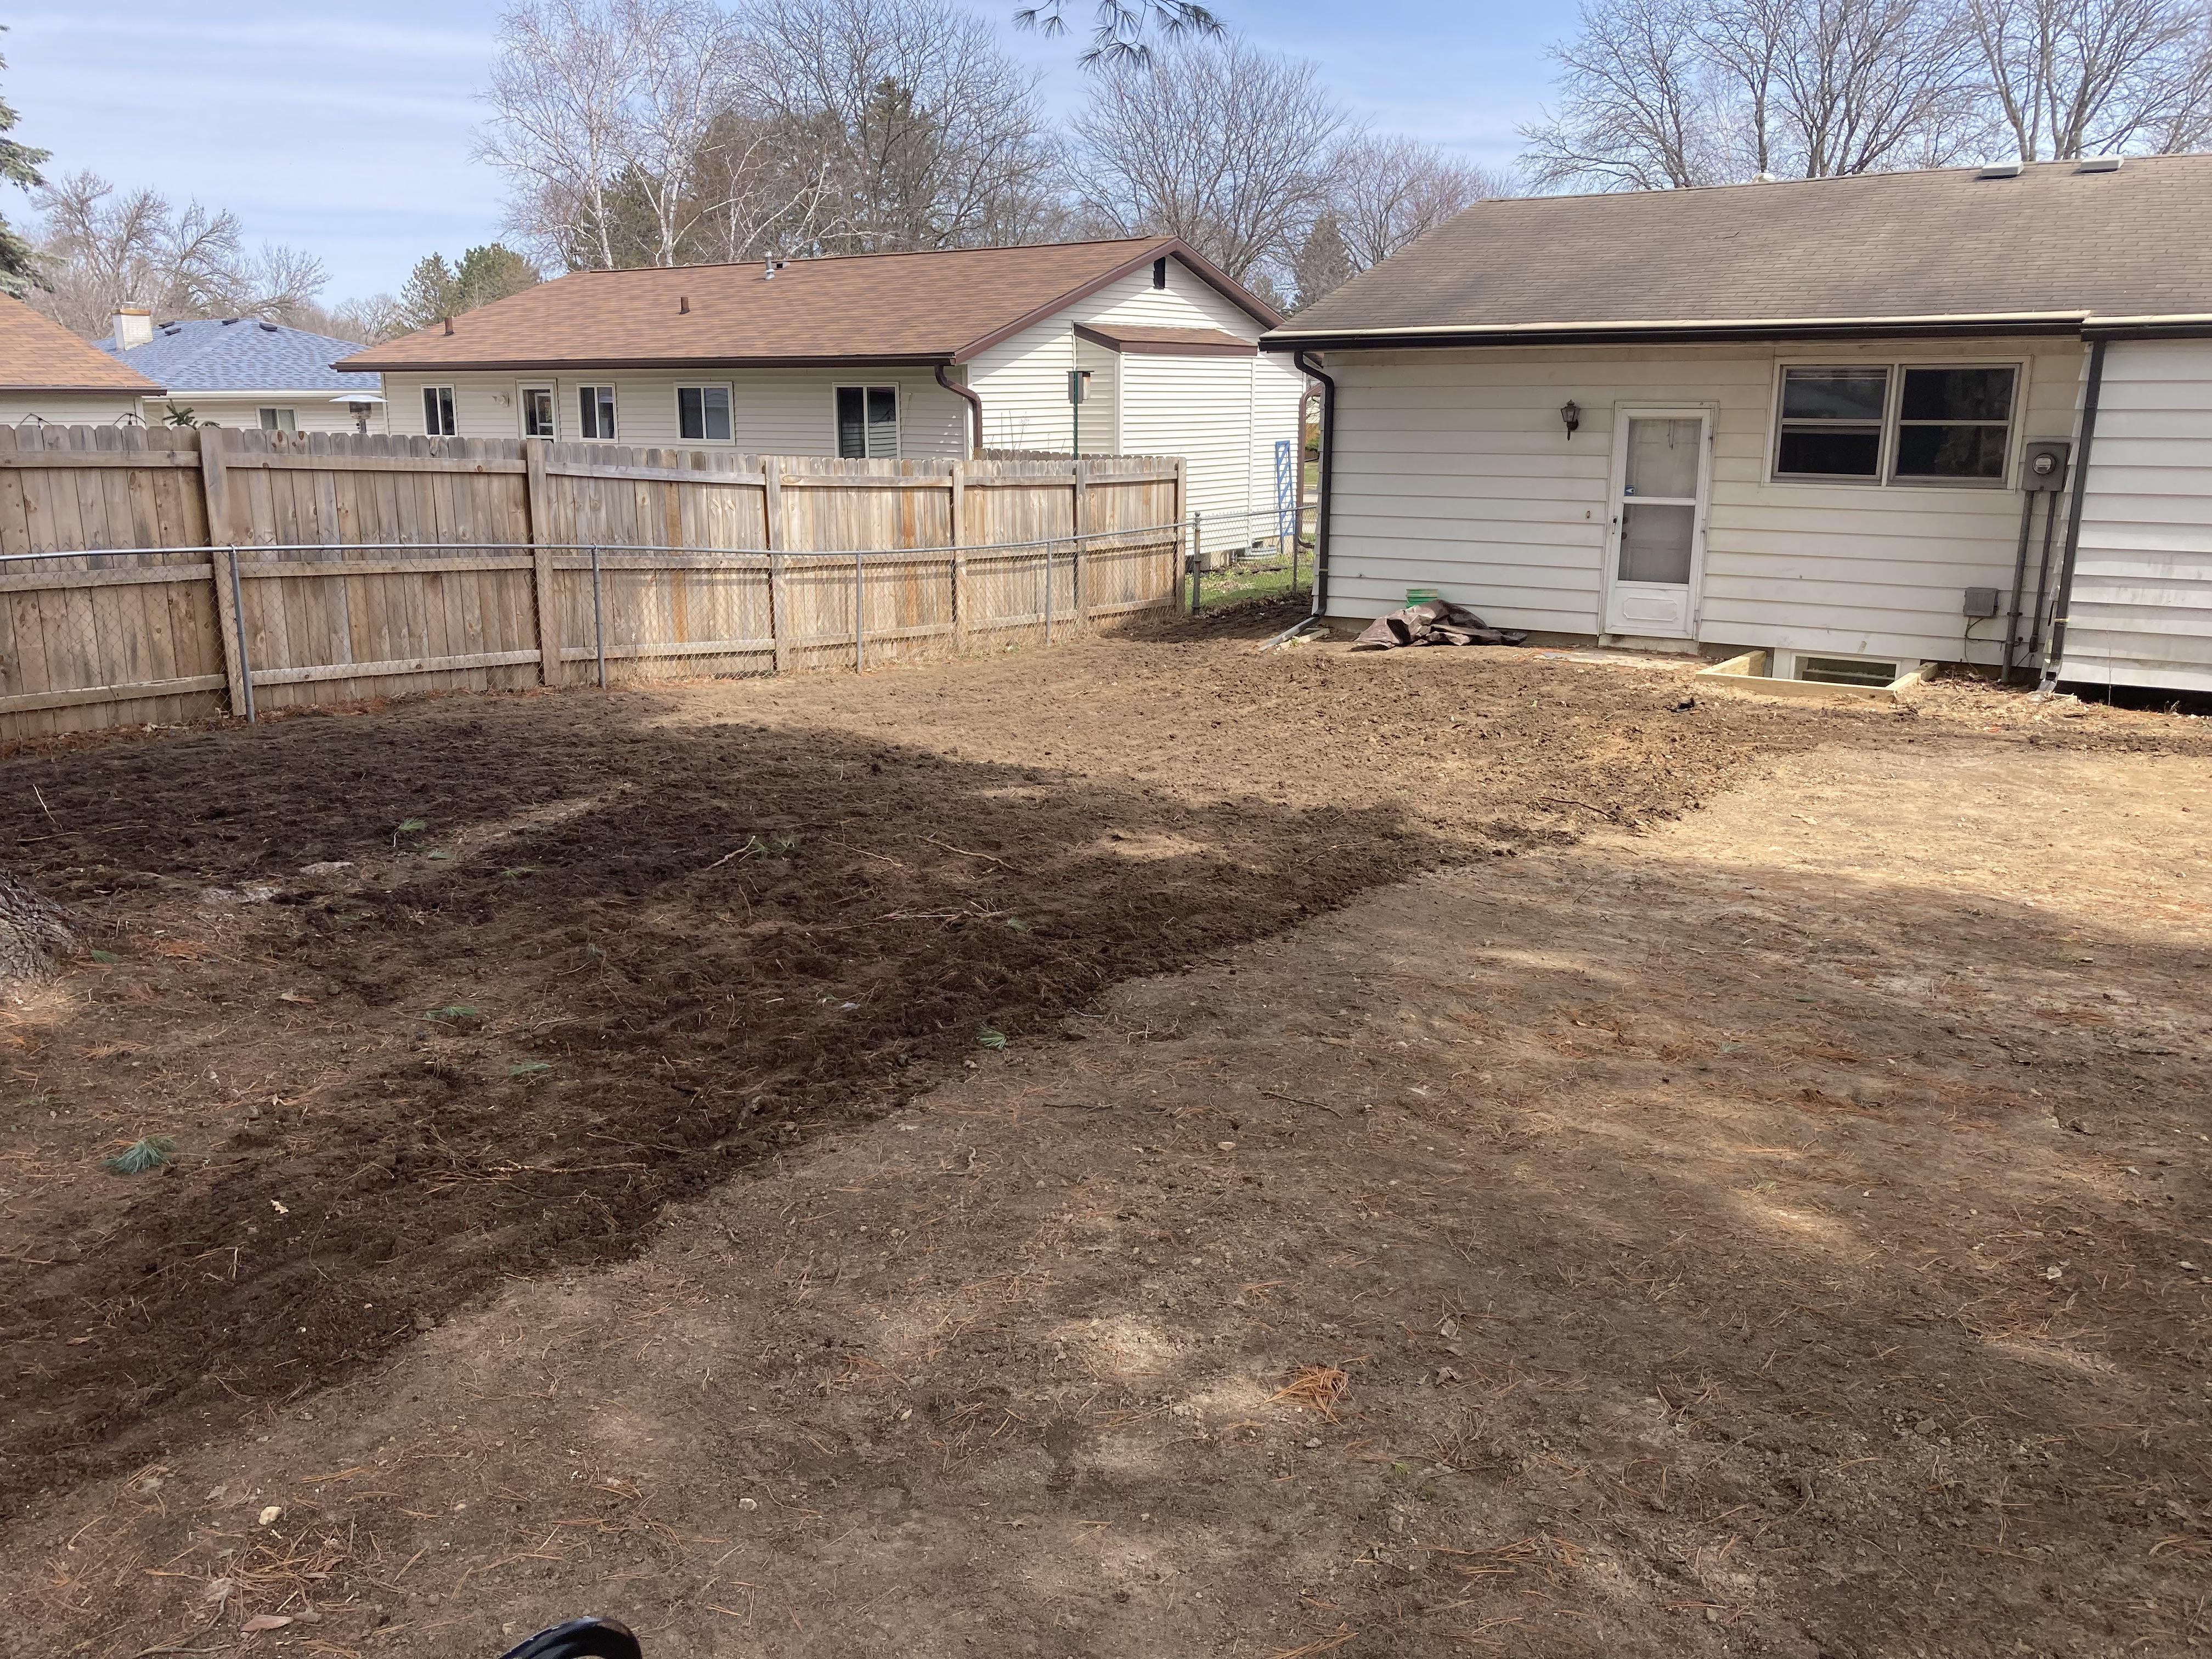
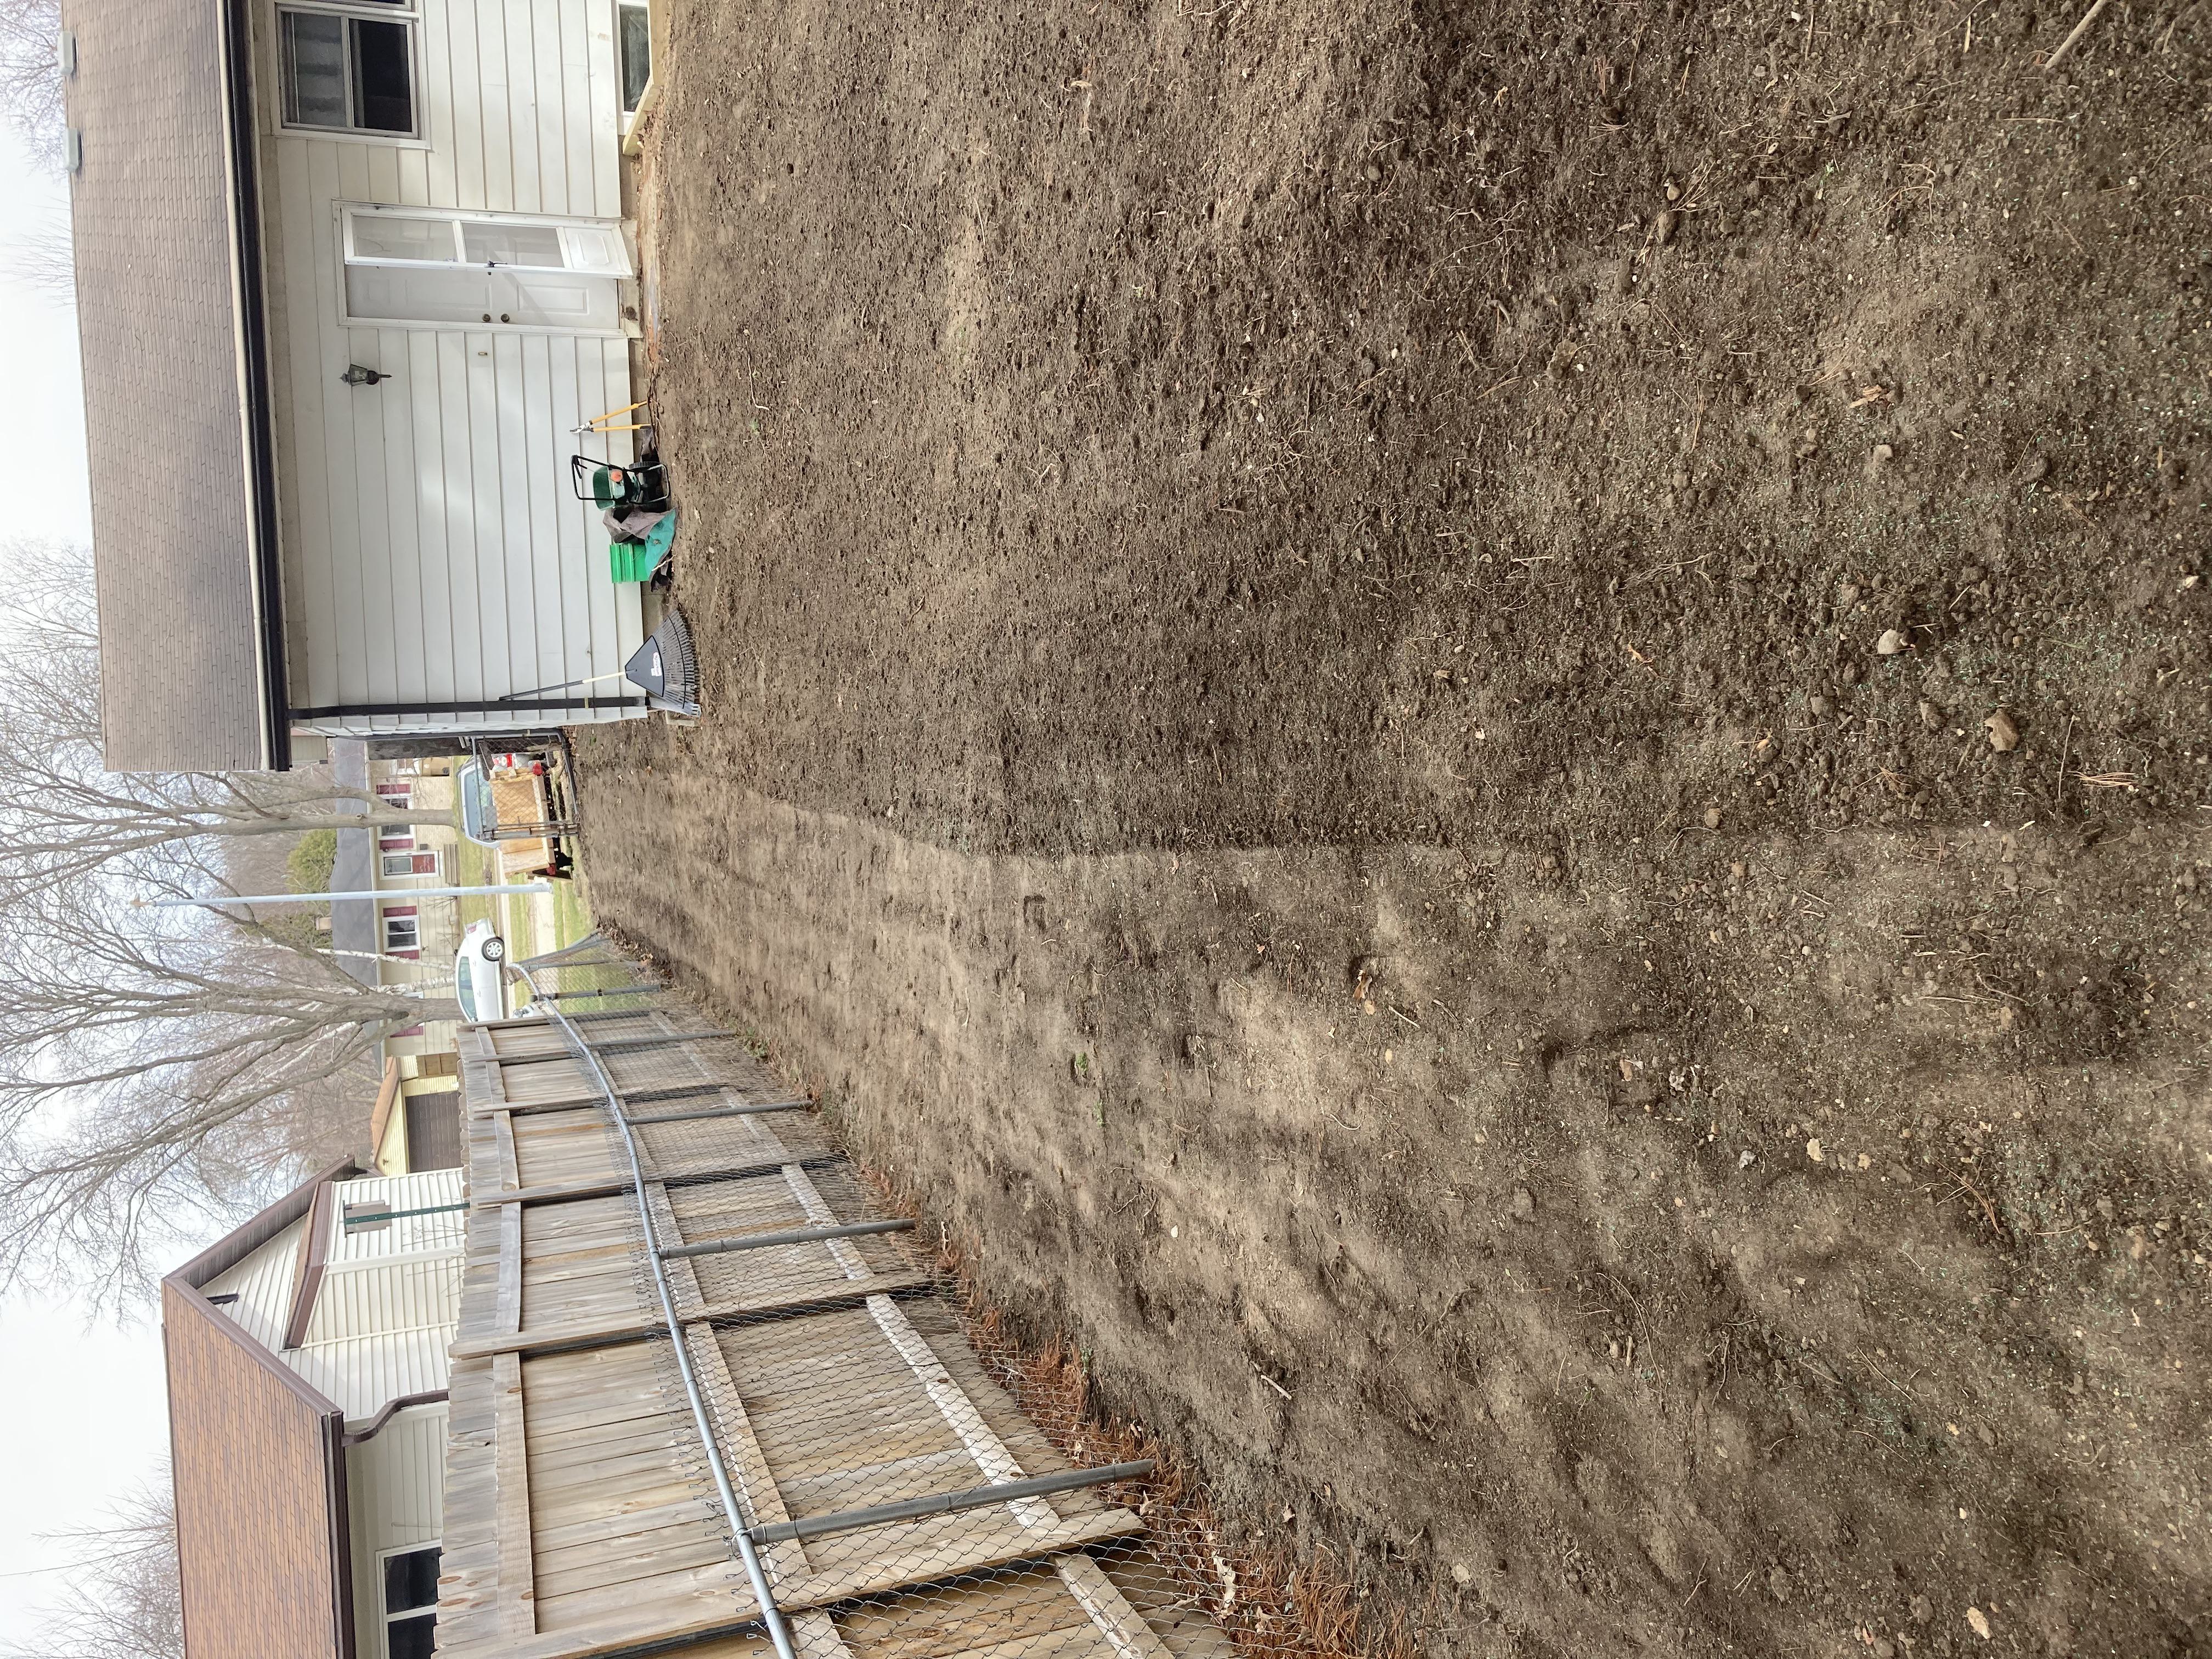
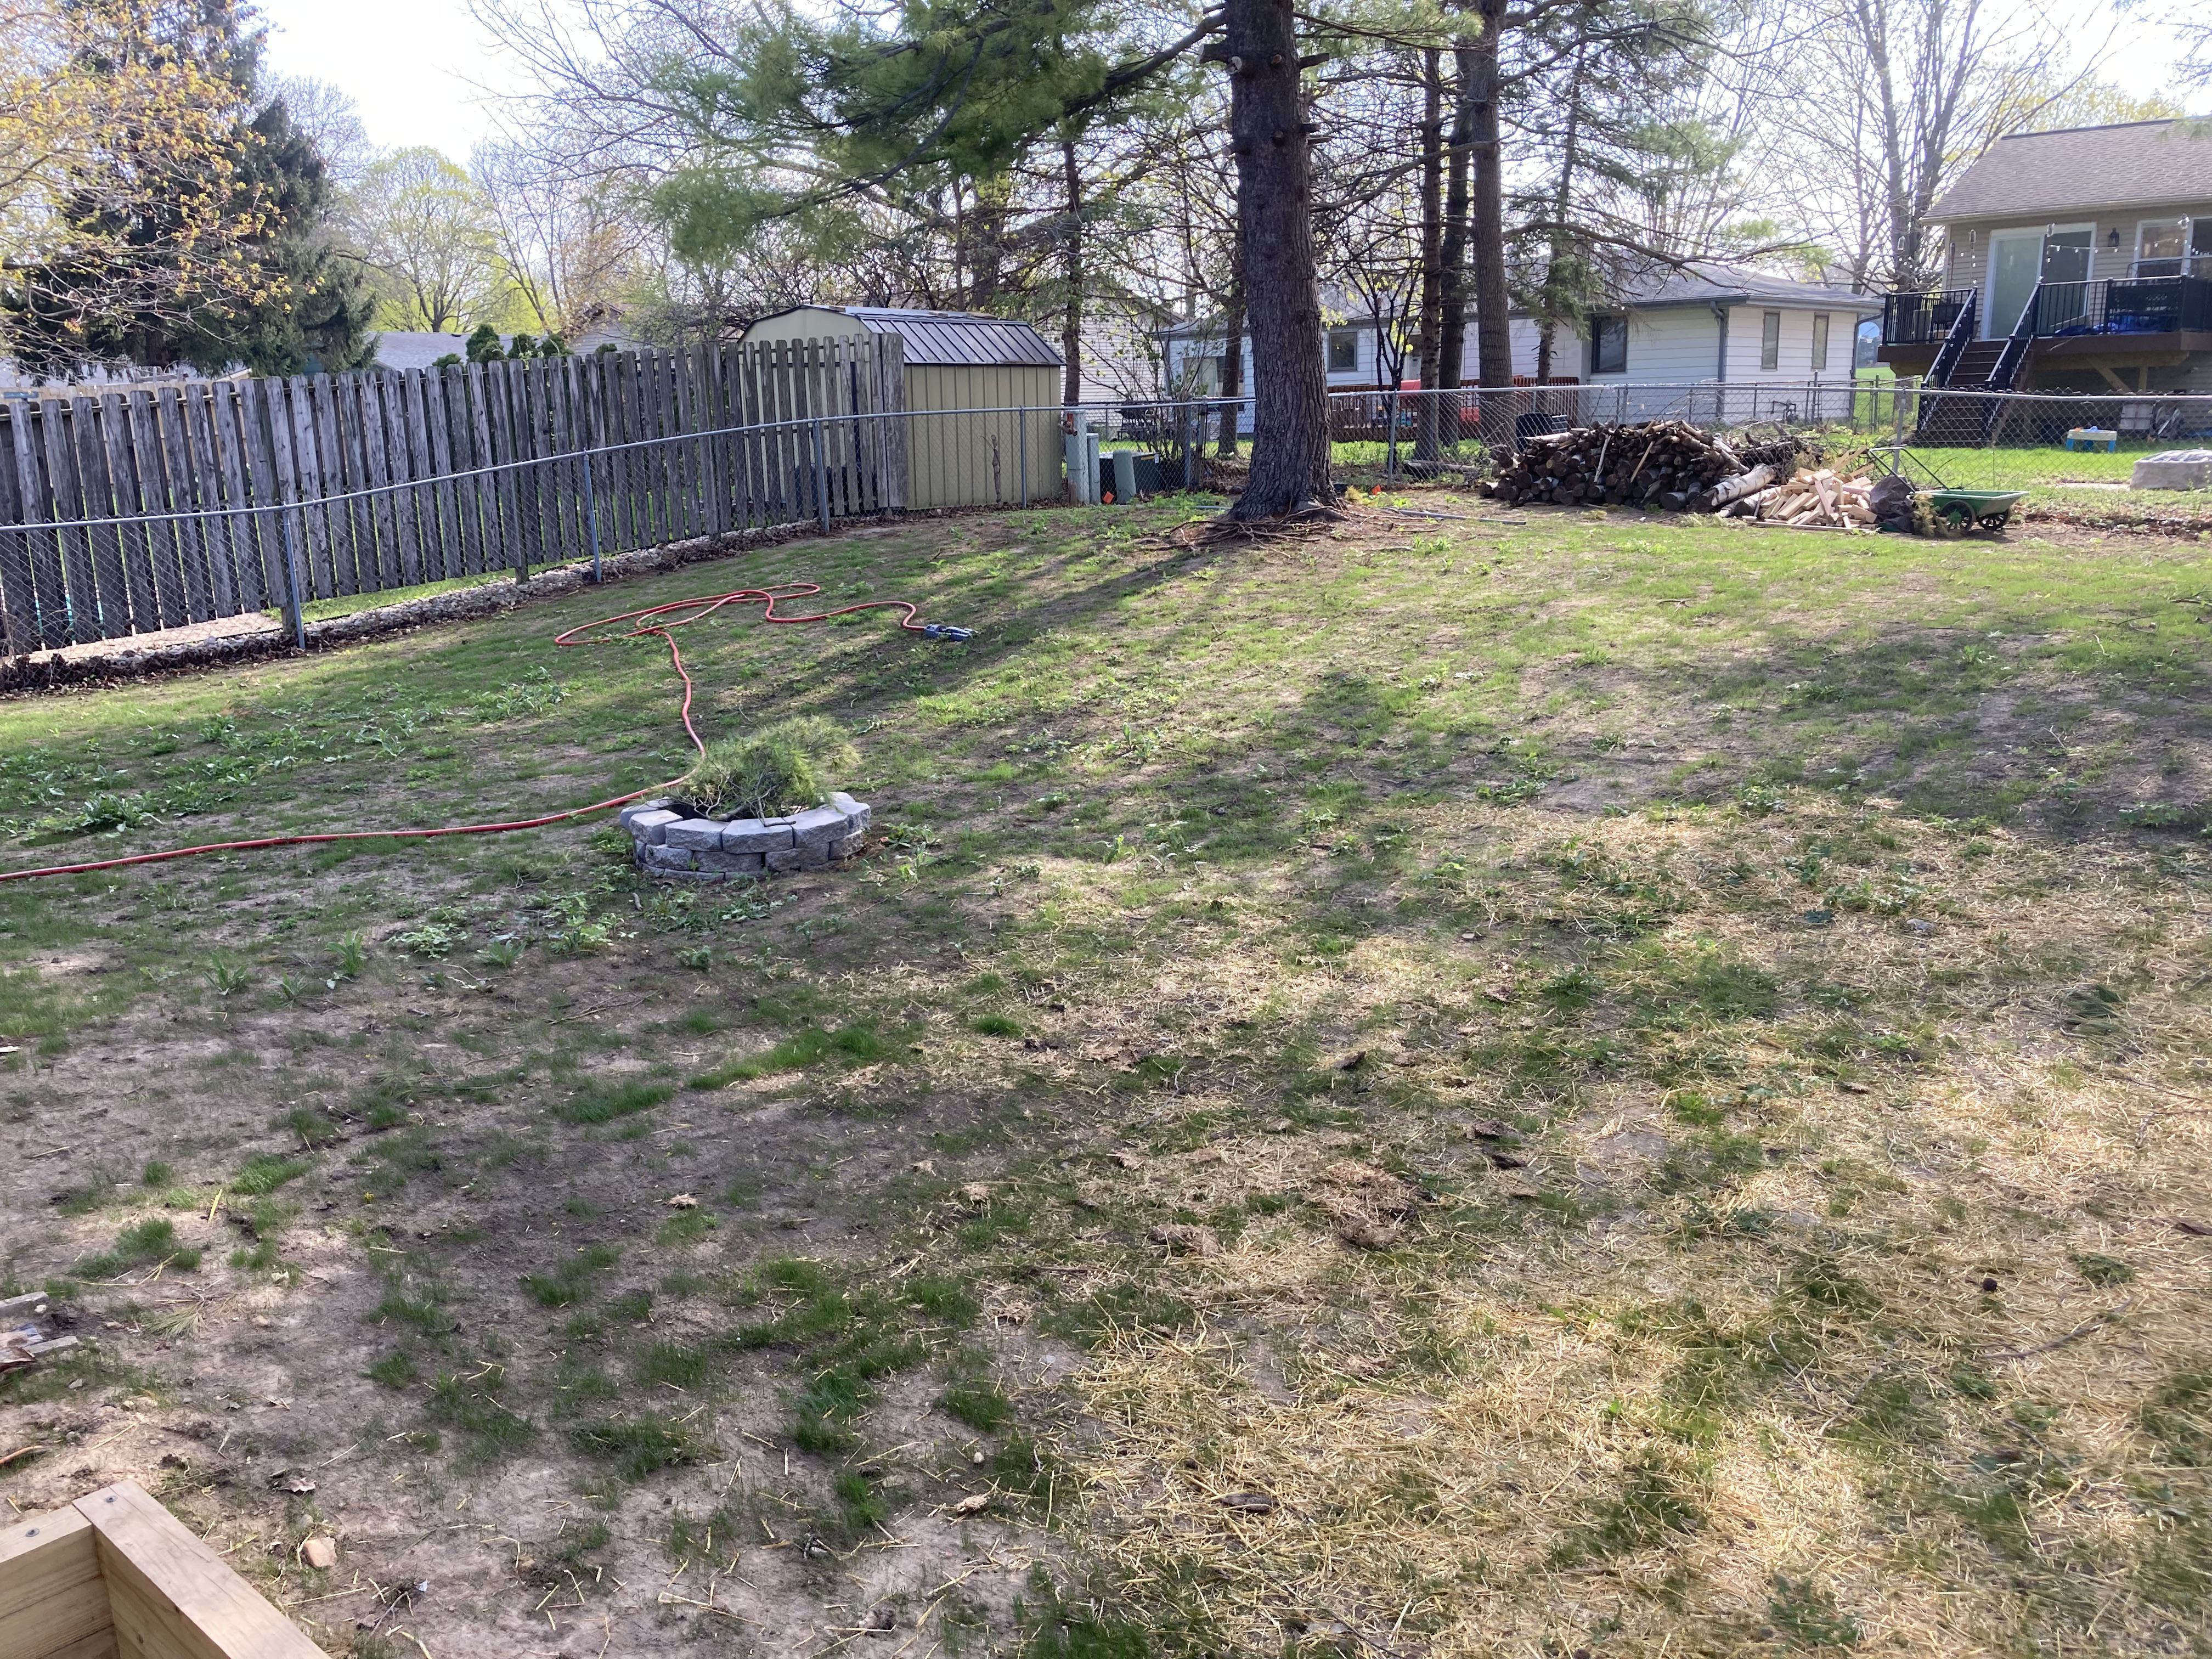
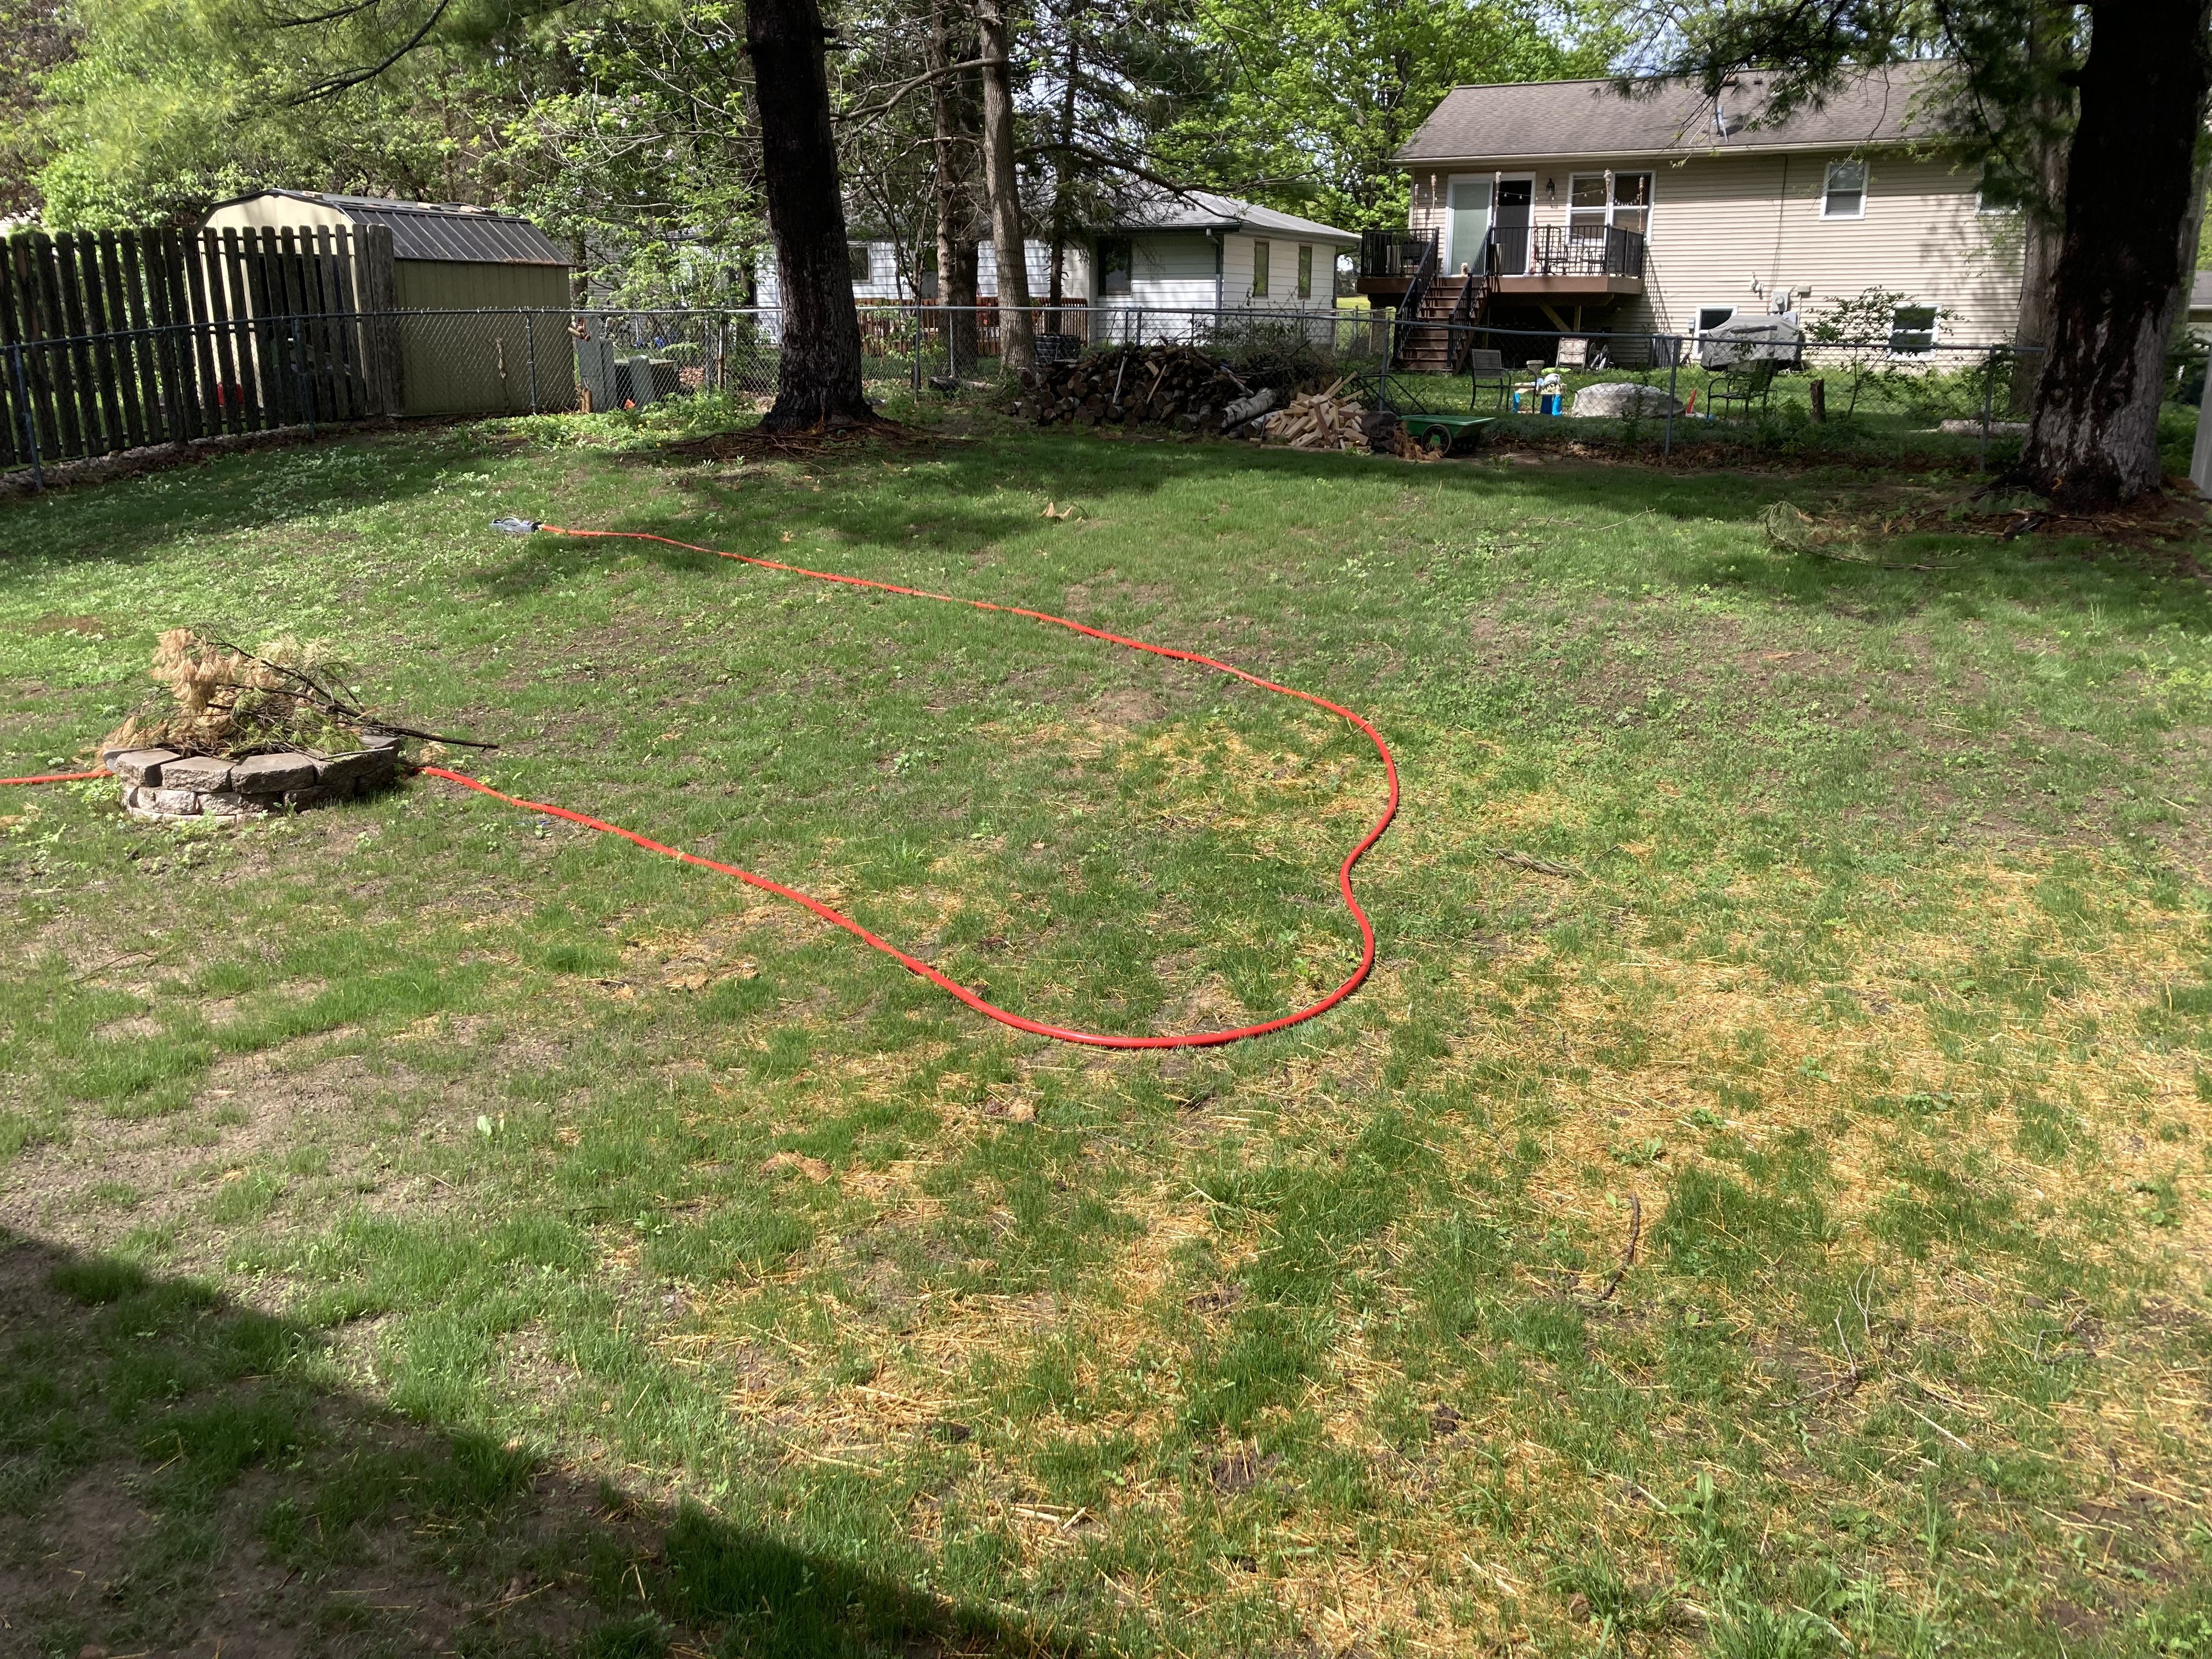
If you’ve read “The House Flip Hustle Pt. 1," you may have some sense of what the backyard of our house flip looked like when we bought it. In case you haven’t, a picture is worth a thousand words, so here’s a four-thousand-word summary:
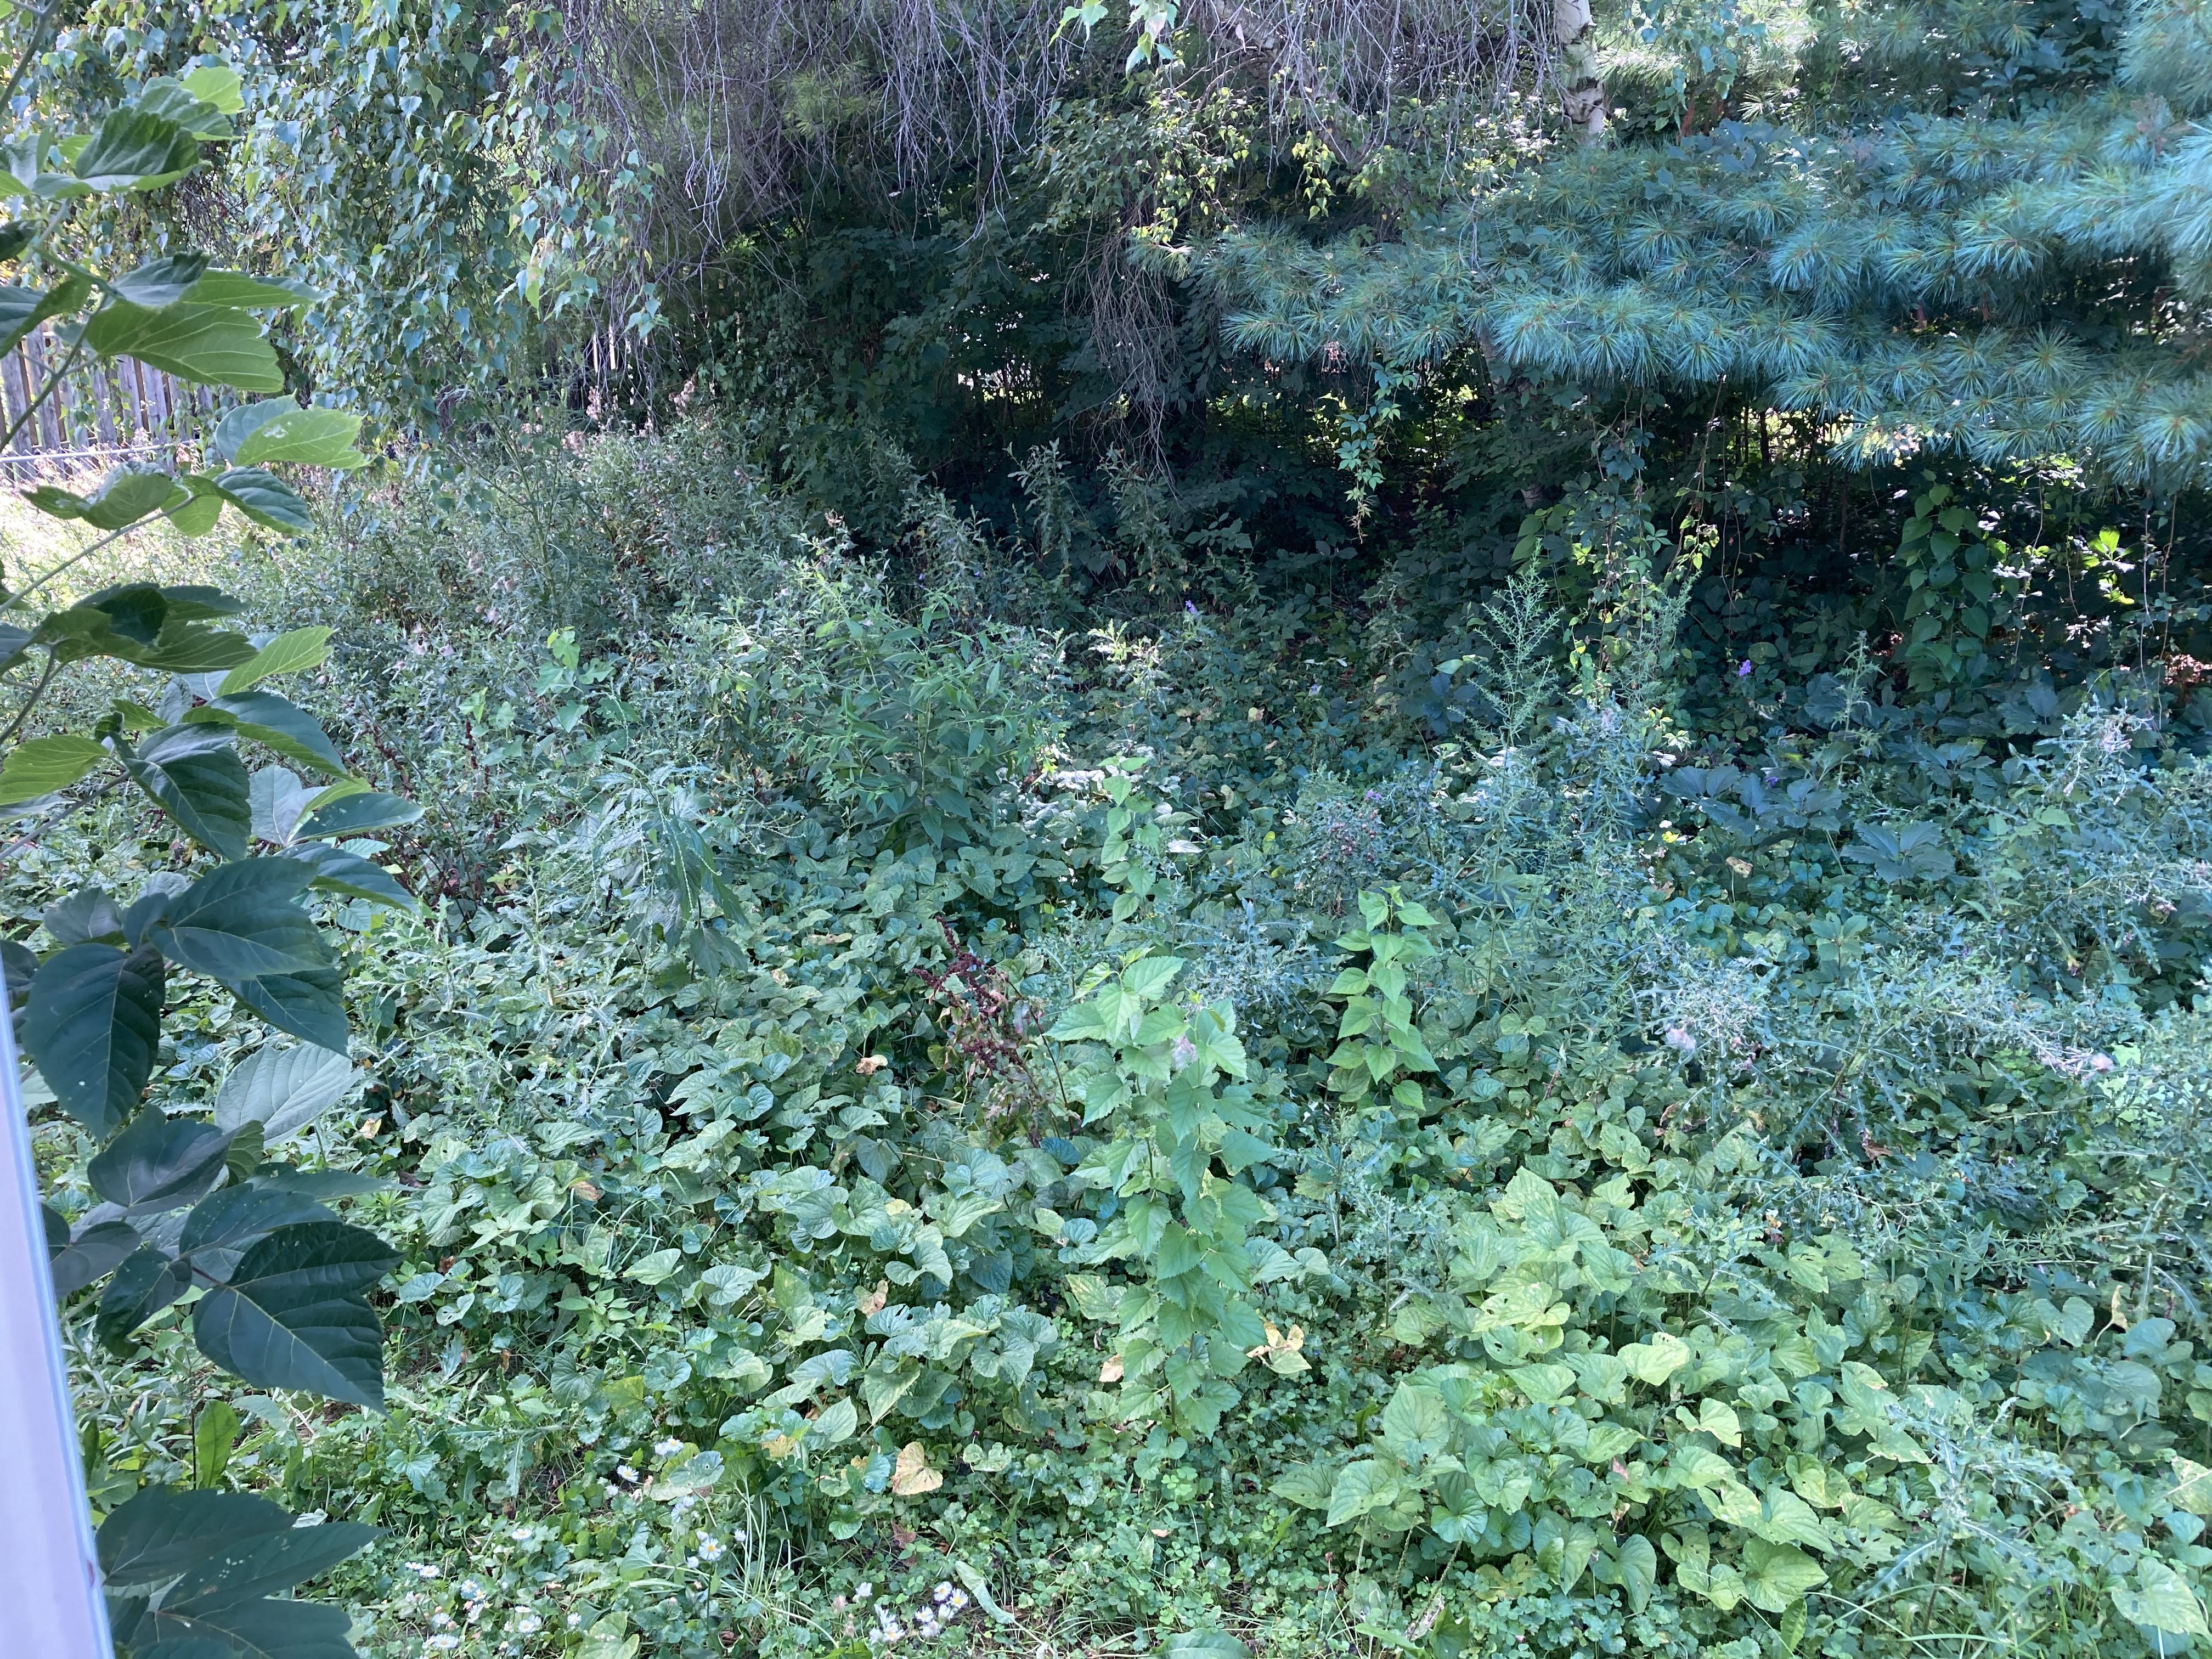
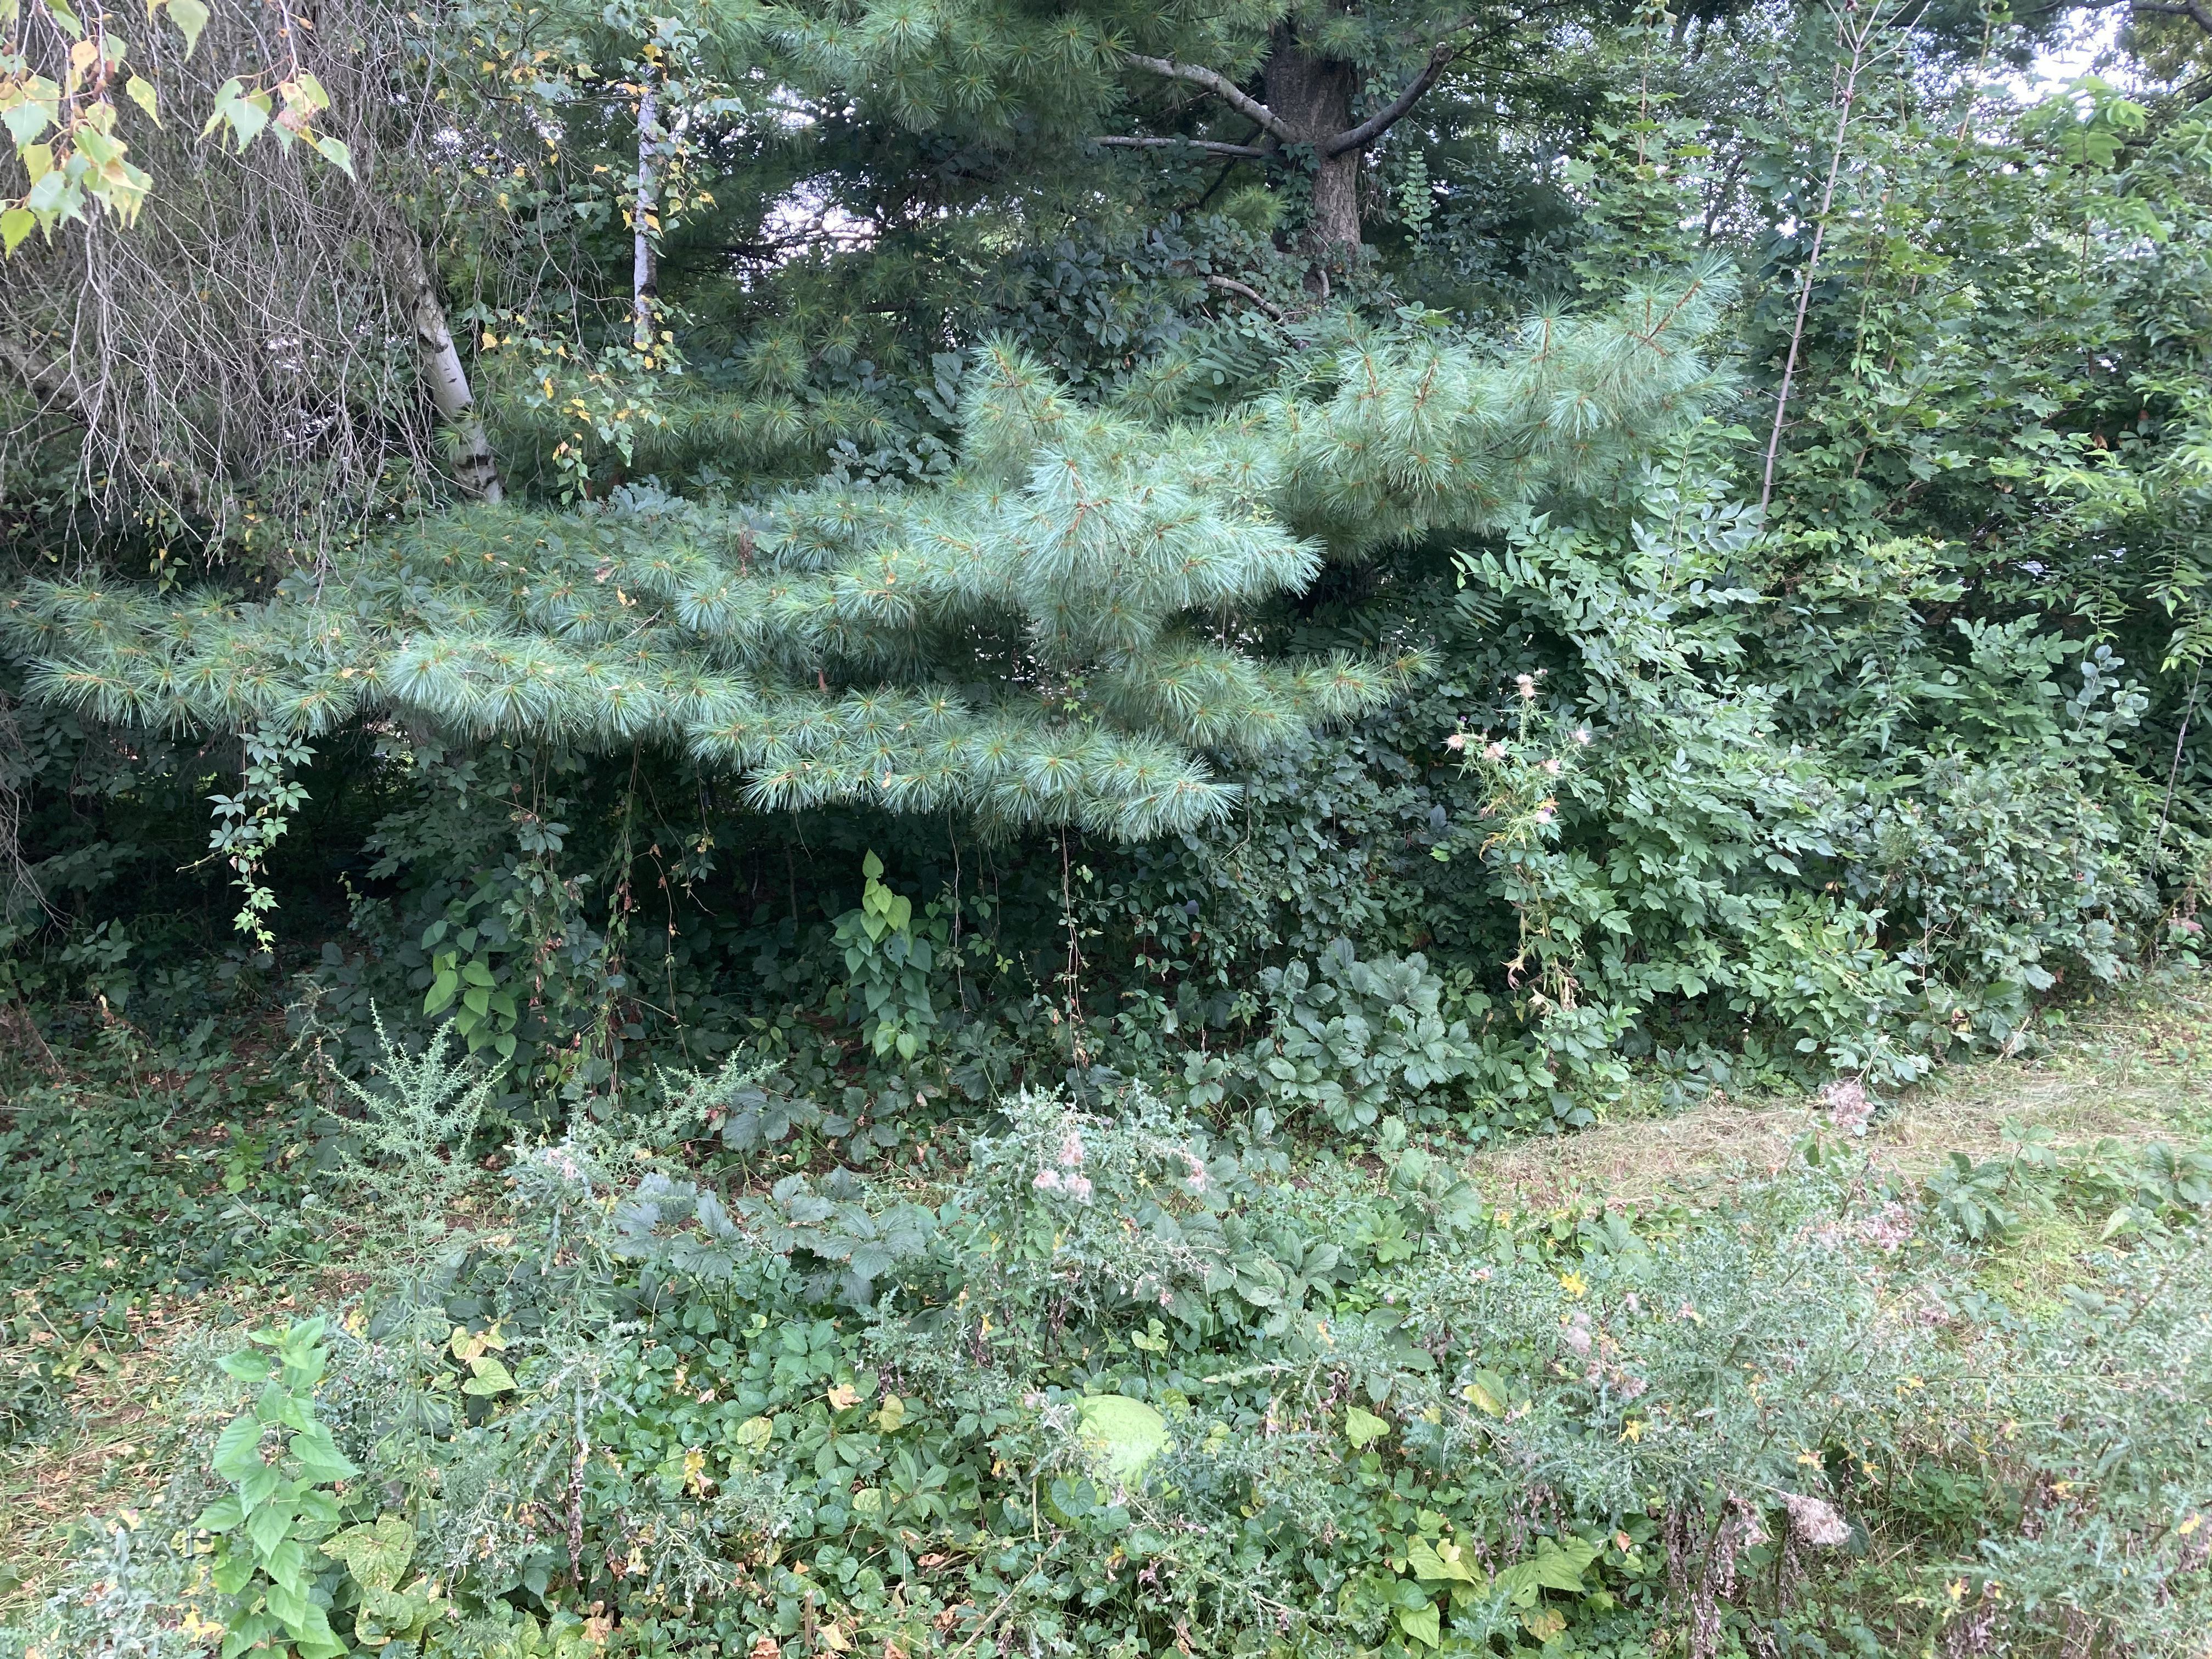
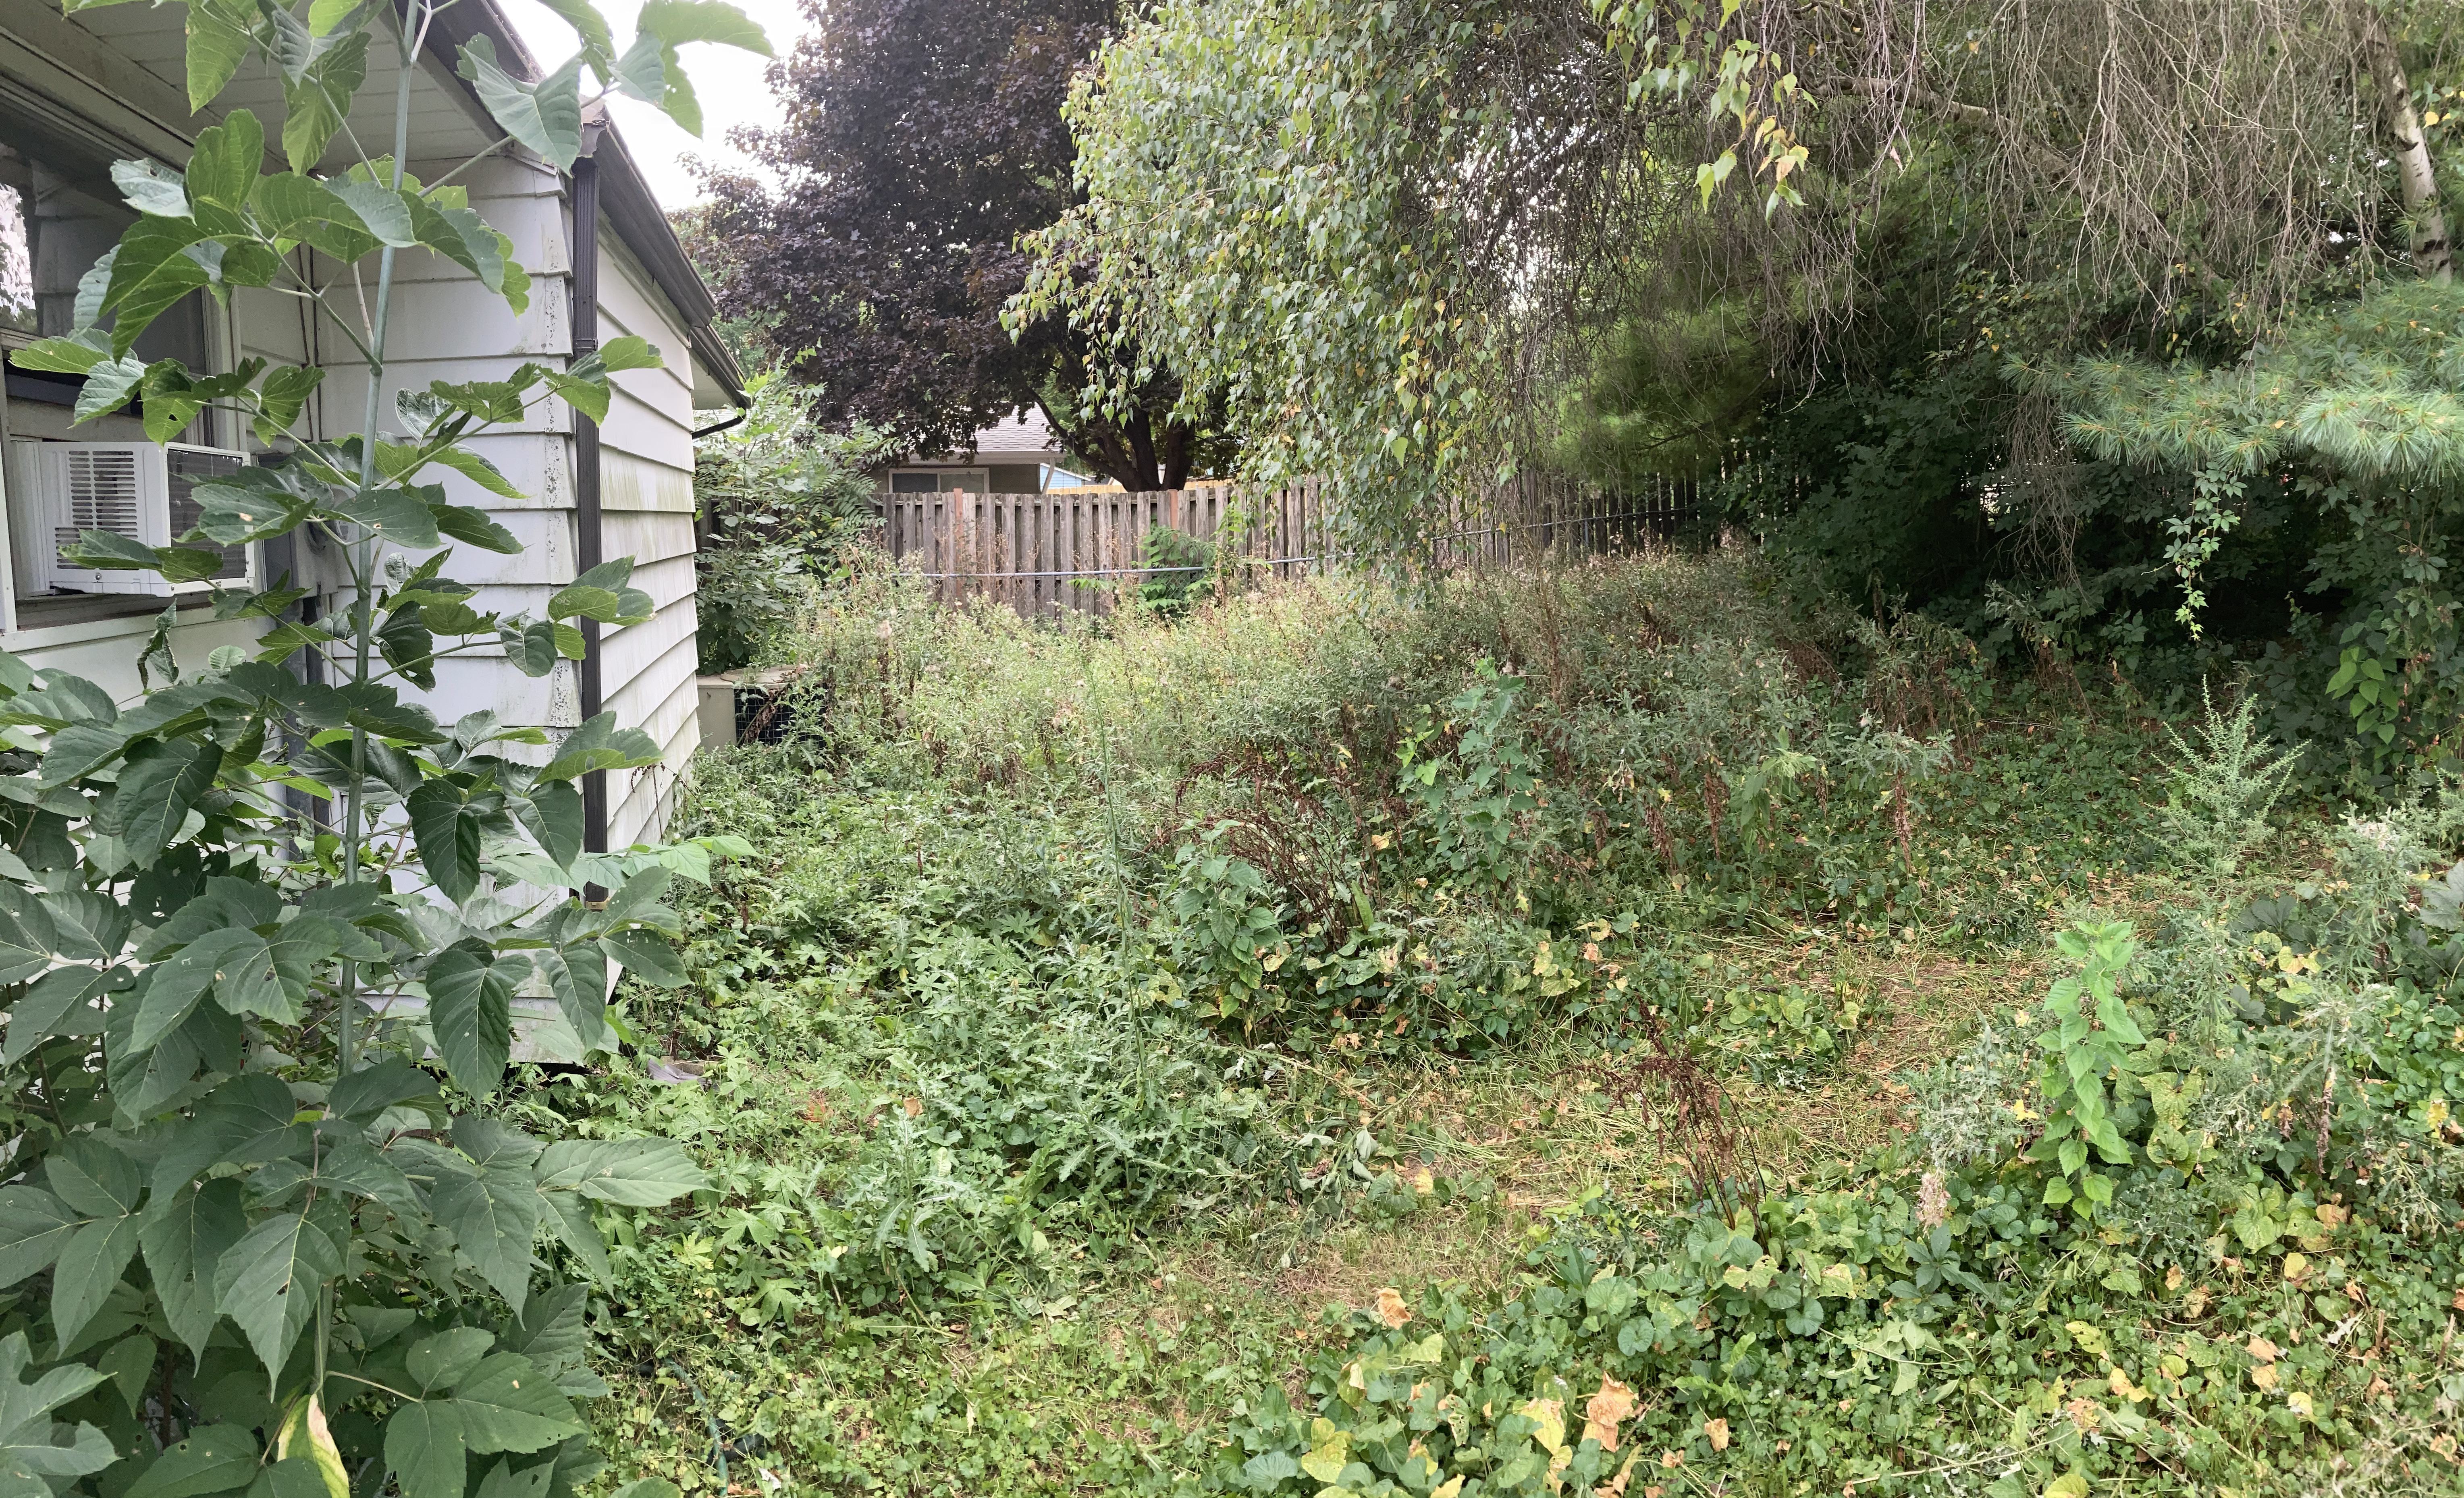
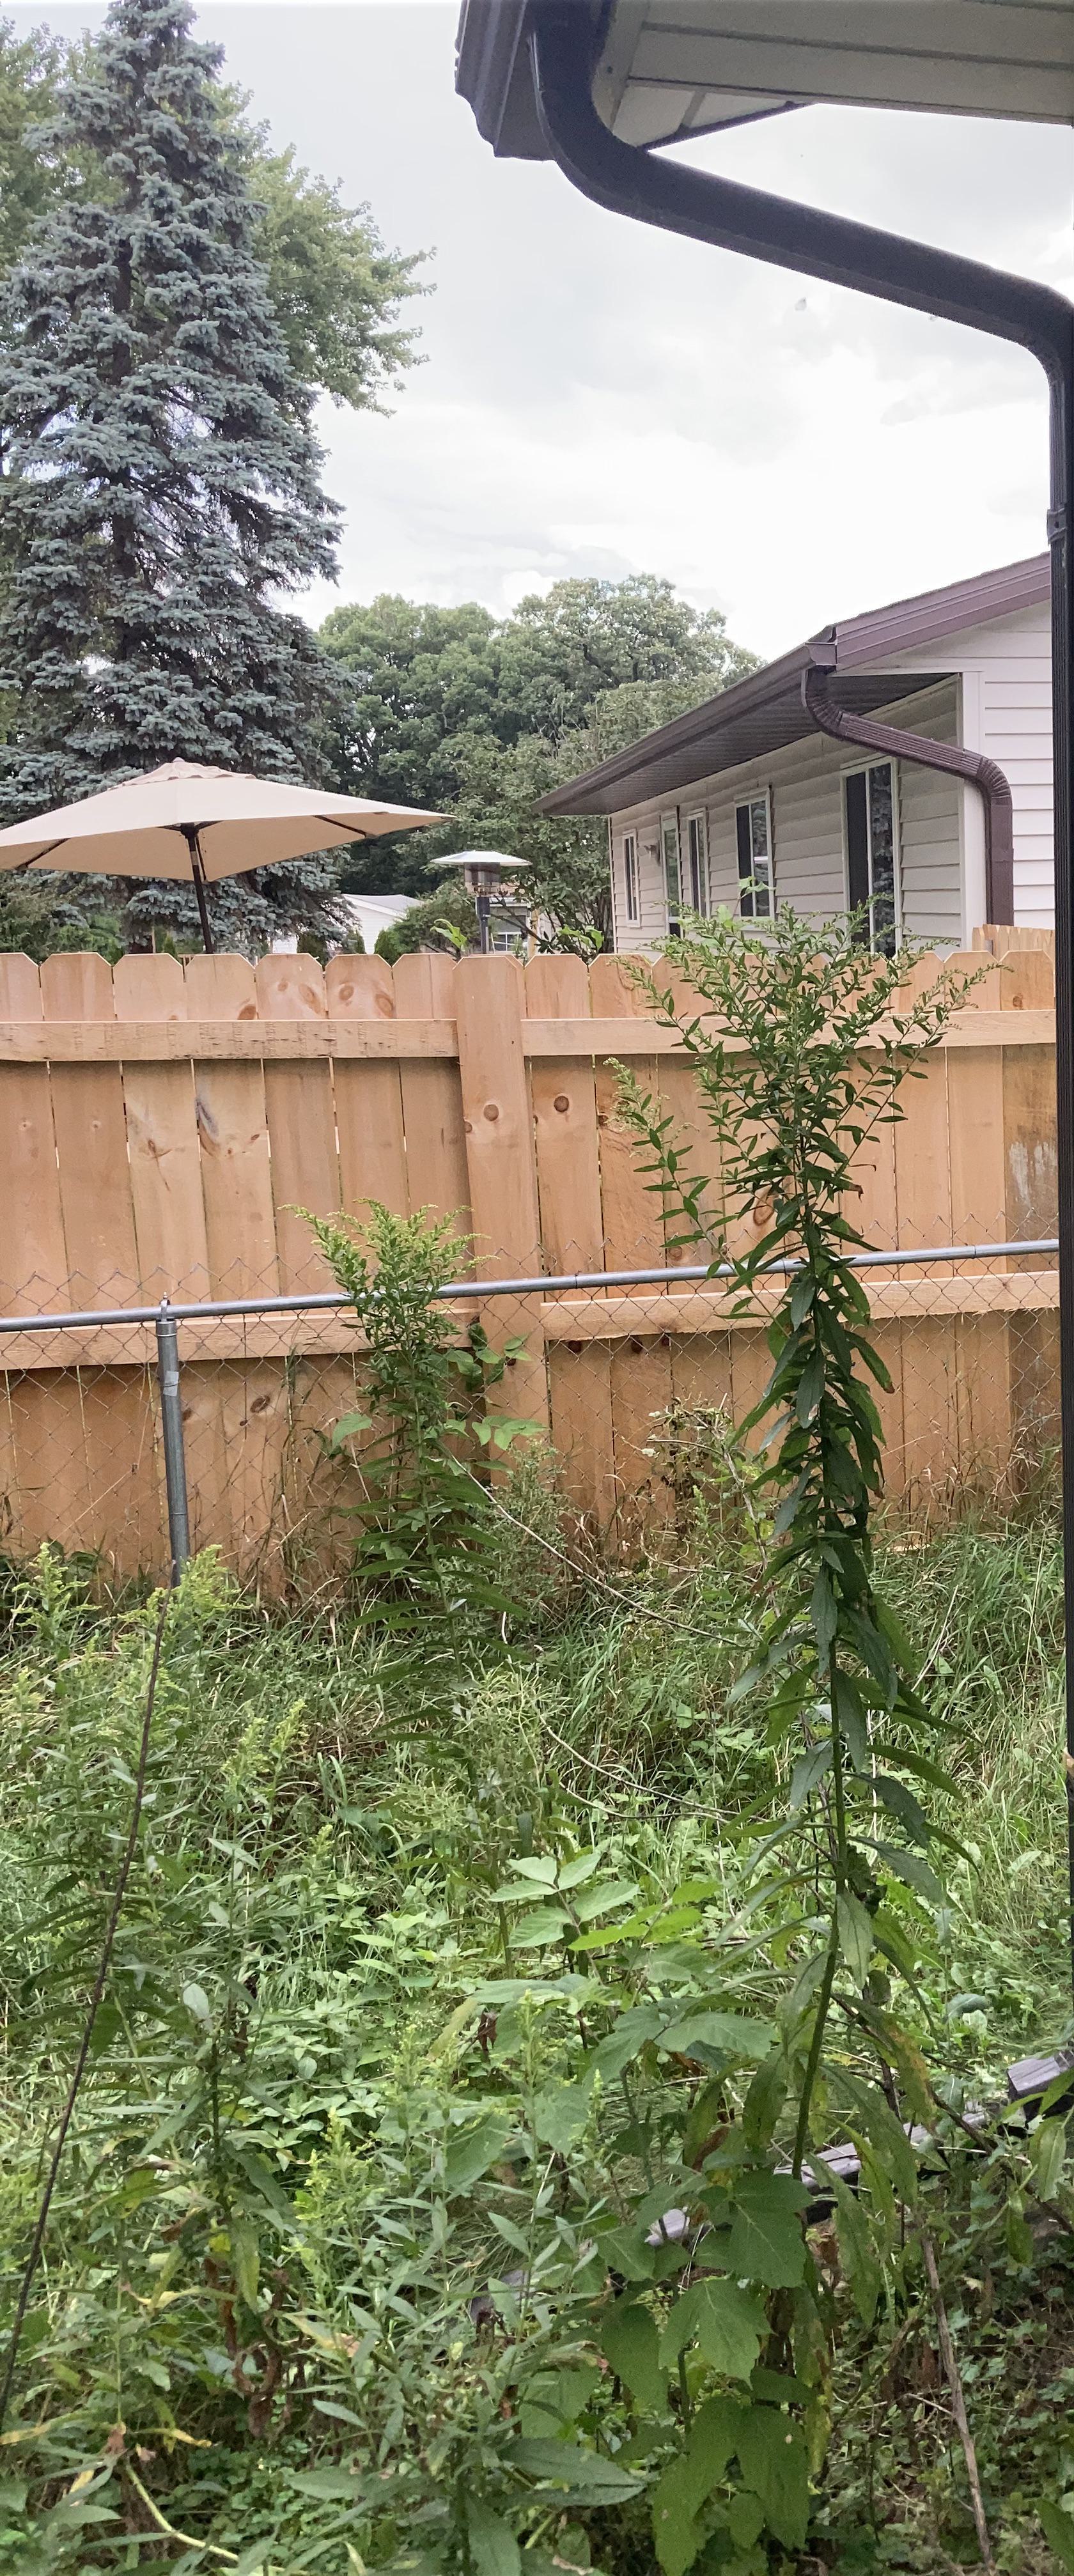
Admittedly, we bought this house over zoom because, hey, it was the middle of the pandemic and all that; there were no open houses, no by-appointment visits, no opportunities to see things with our own eyes before putting in an offer. Lessons learned I guess!
Day One
Anyway, what to do about this backyard? It would quite obviously require extensive work, and because Z and I already planned to spend winter breaks working on the inside, we decided to get started on the outside right away. The first step, we decided, was to clear cut much of what we could see, from the thorny thistles and the viny wild violet that crept tortuously across the yard, to the sagging boughs of the towering white pines that bookended either end of a whispy, dying birch. Luckily, we came armed with a $35 lawnmower from Craigslist, and two semi-functional weed whippers that were purchased as a pair for $15!
Like Aragorn and the Gondorians before the Black Gate, we charged against the mud-born masses of uruk-hai thistles, ready to win this battle against all odds.

In the first night of work, we made appreciable progress. The lawnmower, surprisingly, was wholly adequate for the task at hand, and a good lopper from the hardware store made short work of the throngs of sapplings that had sprouted all over the yard (a brief side note – loppers are one of the most enjoyable garden tools in existence. Seriously, if you’ve never cut down a bunch of sapplings with one, go give it a try!). While this left dozens of punjis for me to cut/dig out the next spring, by the end of night one we had successfully mowed down most of weeds, and trimmed off the lowest branches of the white pines.
White pines, taxonomically referred to as Pinus Strobus, are magnificent trees, and one of my very favorite conifers. They can be identified with ease, as they are one of the only (in fact, I believe they are the only) pines in the Midwest with 5-needle fascicles – in other words, to identify the white pine, pick a cluster of needles and count how many needles are in the cluster. If it’s five, you’ve got yourself a white pine. Two needles usually means it’s a red pine, or Pinus Resinosa. Generally, with conifers in the Pinaceae family, one must be concerned about pine rust, a parasitic fungus that tends to affect the trees lowest branches, but which rarely causes outright death to trees that are well-established. During the summer between my freshman and sophomore years in high school, I participated in the Minnesota Conservation Corps for two months, and it was here that I learned how to trim white pines to prevent rust. As my crew trimmed remote trails in northern Minnesota, I was exploited for my height; standing at 6'4”,not only could I reach the higher branches, but because we were instructed to cut any branch that hung lower than 6’, I just decided to cut any of the branches I hit my head on – sweet, sweet revenge 😈! To properly trim the branches in a way that doesn’t unduly harm the tree, use a sharp lopper to cut the branch about 1"-2" from the trunk, ensuring that the cut is clean and orthogonal to the direction of the branch’s growth. The reason we avoid cutting too close to the tree is that doing so can cause a wound that the tree has trouble healing.

Day Two
After only one afternoon, the backyard was looking better, which was enough to make Z and I excited about the next day of work. Remaining was to cut down the sickly birch, get rid of the stump (a task that would end up being much more work than anticipated), remove 10+ years of built-up pine needles, finally kill all the weeds and remove their remnants from the dirt, till the soil, and plant new grass.
I’m getting ahead of myself, though, as some of these things wouldn’t happen until the following summers. In the meantime, we built a firepit to burn some of the brush that had accumulated (as well as to enjoy the slow roast of some yummy marshmallows, complete with honey graham and Hershy’s chocolate). The first thing we would burn was the birch, which we cut down the second morning at first light. If you’ve never burned birch bark before, it’s a very unique experience. Imbued with sap, the bark lights quickly and ferociously, curling into tight coils of black char as a thick, sweet smoke crackles out of its flesh. It makes a great fire starter in my experience.

By the end of the fall, the backyard was starting to look more like a yard and less like a jungle. There was still a lot of work yet to be done, though, but with winter on its way and the school year beginning, we put things on pause for a bit.
Summer Two
The following spring, as the snow melted and the little shoots of green (aka all of the weeds) started to pop up all over the back yard, I knew my work was cut out for me. Raking all the debris proved to be a monumental task and took me nearly a week of labor. The challenge was less in the needles and more in the extensive growth of the wild violets that had set up camp there. Wild violet is a pretty weed, in my opinion, sporting small, purple flowers. It’s also a rhizomatic plant that proliferates by sending rhizomes, similar to underground vines, radially from each plant. If you see the flowers, expect to be ripping out many feet of these vines from the ground.
Eventually, the weeds did capitulate to my mighty hoeing prowess (sorry y’all, I couldn’t resist), and the yard looked more or less like a clean slate. Next on the docket, getting rid of the mythical stump.

The Mythical Stump
The birch we cut down the fall prior had left a hefty stump smack-dab in the middle of the backyard. Normally, with a stump like this, the average sane person would call someone with a stump grinder. The more intrepid individual might even choose to rent their own stump grinder. But neither of these options suited us. Z and I are, after all, grad students on the most budgety of budgets. As the motto we used to repeat went, “We have time, not money.” (Little did I know at that time that Z would be choosing to leave UW Madison for Cornell University in Ithaca, NY, leaving us with neither time nor money. It’s a decision for which I cannot fault him, but it certainly meant progress had to happen at a quick trot.)
Instead, we decided we would wage a more primitive war against the stump by drilling some holes in it, soaking it in kerosene, piling a bunch of charcoal on it, and trying to burn it out.
The fall prior when we decided upon this course of action, we had the foresight to drill the holes and add a natural stump decomposer with the intent of punking up the wood before it was time to burn it. The stump decomposer was none other than a bottle of KNO3/potassium nitrate, which, by the way, when mixed with equal parts sugar and caramelized on the stove makes excellent rocket fuel if funneled properly, and a decent smoke bomb if not. To aid in its death we made the stump our dumping ground for used cooking oil in the middle of winter. There is nothing sweeter than to see liters of hot, scalding oil send up plumes of steam as it is poured over the remnants of a foe fallen-yet-standing.

Needless to say, all of this didn’t work and the burning did almost nothing to the stump. The stump had become this mythical beast, unyielding and unwilling to move. The first of a series of Herculean tasks on our Hero’s Journey. We were left scratching our heads. What to do next?
I had long ago decided that trying to dig the stump out would be too cumbersome, and at this point we were on the verge of calling an arborist to come take care of it for us. Luckily I’ve always been a stubborn sort, and to quote my father, “you ain’t licked until you’re licked.” I would give digging out the stump a try.
This process was quite difficult, owing to the fact that the tools at my disposal consisted of a blunted axe and a German Army trenching shovel from the 1950’s (the most reliable tool in my arsenal). And yet, we eventually, slowly, managed to pry it out.
Two men, laborously chopping away at a stump inconveniently sprouting from the center of their stead. Sound familiar? If it doesn’t, you probably didn’t grow up around spaghetti westerns or haven’t studied much film. If it does, you’ll know I’m refering to the 1953 American classic, “Shane,” starring Alan Ladd in the titular role, with Van Heflin as the stead owner. We simply couldn’t pass on the opportunity to pay homage:
With that out of the way, we could move onto the next step: killing the remaining weeds to establish new grass.
I’ve never been a fan of using harsh chemicals for the sake of a pretty lawn, and the idea of using glyphosate in a town surrounded by lakes and pristine marshes that would eventually accept any such chemicals as runoff didn’t sit well with me. Yet, if ever there were a yard that warranted such treatment, I do believe it was ours. After a few rounds of glyphosate, the yard was sufficiently dead and ready, like a phoenix, to be reborn from its own ashes.
Now came the issue of how we would actually get anything to grow. Sod was the easiest answer and almost guaranteed to work, but with a footprint of nearly 4400 square feet, our backyard was simply too large to make this an affordable option. Instead, we would try to spread a grass seed blend, painstakingly care for it by watering it day after day, and hope that something sprouted.
Planting grass seed is best done in the fall, approximately 10 weeks before you expect the first hard frost. These 10 weeks tend to be cool, which helps the grass in numerous ways: first, the cool weather won’t scorch the new grass the way summer sun might, which gives the grass time to establish a robust root system. Second, it aids in water retention, which is the most essential component of successfully planting new grass. Unfortunately, we missed the window of opportunity and had to wait until the next spring to plant (spring also provides a window of cool, damp weather that lets the grass send its roots deep into the earth in search of nutrients).

By the time spring rolled around, the yard really did look like a clean slate, so we ran off to Home Depot to rent their biggest self-propelled tiller and a drum roller. I wound up with delightful Honda rear-tine that basically did all the work for me at only $70 for the four hours it would take to get the tiller home, till, spread new seed, roll, clean up the mud, and return the units. All in all, between the seed, rentals, and glyphosate, the soon-to-be lawn had set us back around $400, a far cry shy of the $4000 fresh sod would have cost. All that was left, aside from some later beautification with mulch and monster-sized hostas, was to water and wait.